Sign Quest
Info

- Requirements
- Base Level: 50
- Item(s) (Consumed):
- 100
 Fluff
Fluff - 50
 Poison Spore
 - 30
 Scorpion Tail
 - 20
 Rotten Bandage
 - 15
 Little Evil Horn
 - 10
 Empty Test Tube
 - 2
 Yggdrasil Leaf
 - 10
 Green Herb
- 100
- Various Art Items:
- 10
 Royal Jelly
 - 20
 Honey
Honey - 30
 Bear's Footskin
 - 1
 Hinalle Leaflet
 - 1
 Ment
Ment - 1
 Empty Bottle
 - 5
 Mini Furnace
 - 2
 Oridecon Hammer
 - 1
 Gold. or 1
  Emp. Anvil
 - 1
 Mr. Smile
 - 10
 Worn Out Page
 - 1
 Glasses
 - 4
 Resin
Resin - 12
 Stone Heart
 - 375
 Coral Reef
 - Items worth 11
Points(See Step 14)
- 10
- Item(s) (Not Consumed):
- 1 Level 4 Weapon
- 100,000 Zeny
- Quest Corequisite(s):
- Quest Reward(s):
- Base Experience: At least 3,000,000 (more depending on options selected)
- Item(s):
- Access to Cursed Water Fountain
Part 1: Crumbs of Sobbing Starlight
-
Read the Announcement on a notice board in one of the cities. All the announcements are the same, so it is only necessary to read one.
(full enter)
-
Visit Metz, the Archeologist and talk about the announcement. Speak to him again and agree to help him. He mentions Arian, who first tests you for your competency.
(full enter 2x)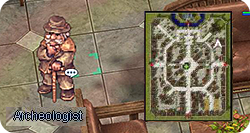
-
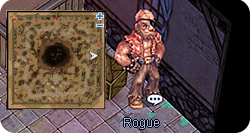
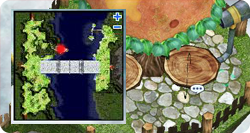
Travel to Morocc talk to the rogue Arian for the first test. He desires the following sets of items.
Warning
Bring only the set he asks for each time and NO other sets
i.e. not 100 Fluff and 50 Poison Spore at the same time.
Otherwise, he will take all the quest items and you'll need to recollect.You can bring everything and drop it on the ground to avoid multiple trips to storage.
Items 100 Fluff
50 Poison Spore
30 Scorpion Tail
20 Rotten Bandage
15 Little Evil Horn
10 Coral Reef
-
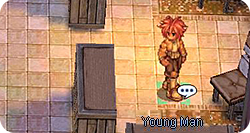
After Arian has all the items he wanted, speak to the Young Man, Gaanan above him. Gaanan will asks 5 questions, to which the answers are:
- Stranded on an island: Fourth option
- Stuck in a collapsed building: Fourth option
- Lost in a dungeon: Third option
- A murder is commited: First option
- The world is going to end: Fourth option (save the world)
After answering correctly, talk to Arian to be rewarded with
1 Crumb of Sobbing Starlight
and experience based on your base level. Now journey to Payon to find Daewoon for the second test.Experience for this step
Base Level Experience 1~59 7,500 60~69 18,750 70~79 25,000 80~89 32,500 90~99 45,000
-
Go inside a Payon building and talk to Daewoon, three rooms SOUTH WEST of the entrance . Select any option to
- Do you have any idea what that jewel you're holding actually is?
and begin his test. You will receive different EXP based on your response here. Whether you suceed will depend on how much your answers appeal to him. The best choices see below.

- 1 Option #1, Yes, I do
- 2 Option #2, I hate people who do that
- 3 Option #2, I can't destroy such beauty...
- 4 Option #1, Yes, of course!
- 5 Option #1, Yes
You can take the test again if you failed. If you succeeded, Daewoon then gives you
1 Crumb of Sobbing Starlight
bringing the total to two.Experience for this step
Base Level Experience 1~59 7,500 60~69 18,750 70~79 25,000 80~89 32,500 90~99 45,000
-
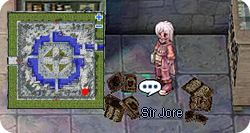
Enter the lower right Aldebaran building and find Sir Jore . He asks for the following items after he fails his experiment.
(full enter 2x)The time restriction (17:00 and 22:00 (UTC)) no longer applies on Arcadia Online.
Items 10 Empty Test Tube
2 Yggdrasil Leaf
10 Green Herb
-
After collecting the items, Sir Jore requires information about the Stone of Sage from two famous alchemists. Talk to Piru Piru in the same building (just north west from Sir Jore) and she'll reveal the location of the two alchemists: the south forest.

-
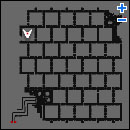
First, find the daughter Pleur on the second floor of the Hidden Temple .
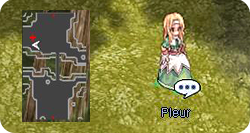
- If entered the maze from prt_fild01: go up, down, left, right, down, up, left, up, up, left to reach the second floor.
- If entered the maze from mjolnir_12 (suggested; one south of Aldebaran): go down, down, left, right, down, up, left, up, up, left to reach the second floor.
Once near her, one of two things will happen.
- You'll be teleported and catch up with both father and daughter alchemists on the same map, thus completing this portion of the quest.
- You'll become "lost" (60% chance) and be teleported to either (prt_maze01) or (prt_maze03).
- Upon becoming lost, keep finding Pleur until teleported to (prt_maze02).
- However, finding her again from (prt_maze03) is very difficult and time consuming.
- it is faster to just return to a save point and come back to the maze again from either (prt_fild01) or (mjolnir_12).
Note
*It is possible to use Teleport level 1 or Fly Wings to get to the spot where the father and daughter alchemists are.
It may take a while, but can potentially be less stressful than getting "lost".
-
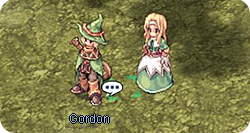
Once caught up with them & , talk to Gordon and select:
- Excuse me!
- Ask about the Stone of Sage
After that expect to be teleported to one south of Aldebaran (mjolnir_12).
-
Tell in Aldebaran what was discovered about the Stone of Sage from Gordon. When he asks what the Stone of Sage is, enter the response
He'll hand over the third
Crumb of Sobbing Starlight and mentions Lady Jesquriennein Geffen.
(full enter)
-
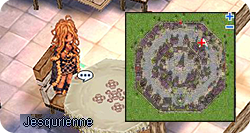
Inside the top right Geffen building is a female drinker, Jesqurienne .
- Oh gosh, it's Jesqurienne
- Stuck-up chick
-
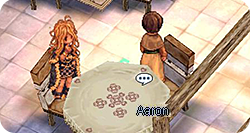
Talk to her boyfriend Aaron at the same table to begin the challenge. In order to win, more or equal questions must be answered correctly than Jesqurienne. The ten multiple choice questions presented will also be chosen at random.
Click to view some examples of questions
- Which NPC is not relevant to the Blacksmith Job Quest?: Barcardi
- Which item is not relevant to the creation of a Counteragent?: Karvodailnirol
- Choose the monster that is a different size than the others.: Marine
- Choose the skill related to the Priest's Benedictio Sanctissimi Sacramenti from the ones displayed in the list.: Gloria
- Choose the material that is not related to the creation of a Condensed White Potion.: Empty Bottle
- Choose the item that is"necessary for a Blacksmith"to create a Gladius.: Sapphire
- Choose the property that is unrelated to the Magician's Bolt type skills.: Earth
- What is the Bunny Band's DEF and its added ability?: 2 / LUK +2
- Choose the prefix or suffix that is incorrectly matched with its Monster Card name.: Golem - Immortal
- Choose the correct name of the ruler of the Rune-Midgarts Kingdom.: Tristan III
- Choose the monster that is a different type than the others.: Penomena
- Choose the monster which does not drop the 'Yggdrasil Leaf' item.: Marduk
- Choose the job class that cannot equip Silk Robe.: Hunter
- Choose the level requirement for entering the PvP Room.: 31
- What is the correct weight for 1 Empty Bottle?: 2
- Choose the correct DEF for the Indian Filet item.: 3
- What is the city closest to Turtle Island?: Alberta
- Fifty-one multiplied by fifteen, divided by three, plus five is equal to...?: 260
- Four thousand five hundred sixty divided by four, divided by two, plus three is equal to...?: 573
- Three thousand one hundred two added to five hundred, plus four, divided by six equals...: 601
- Choose the building that is the closest to the Item Upgrade Place in Juno.: Weapon Shop
- Choose the Hunter's Trap skill which does not inflict Property Damage.: Shockwave Trap
- Which monster would receive the most damage from a Fire Property Dagger?: Hammer Goblin
- Choose the monster on which the Magician skill, 'Stone Curse,' is ineffective: Evil Druid
- Choose the NPC that looks different than all the others.: Izlude Meat Merchant
- Choose the item that cannot be equipped by Novice class characters.: Wooden Mail
Note
If taking too long to answer, the quiz will be restarted.
After beating her, input your character's name and to receive a fourth
Crumb of Sobbing Starlight.
(full enter)
-
Go inside the Comodo casino , and proceed to the second floor.
Talk to a Strange Guy, Dearles .- Excuse me...*
- Here you are
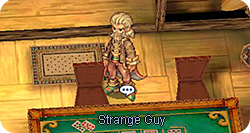
Temporal restrictions on this NPC have been removed on Arcadia Online.
-
Now he'll ask for artsy items. You must collect 11 or more points worth of artsy items in order to continue.
You are not allowed just bring 11 x Red Frame.
You need to collect different artsy items.
Here are all of the known examples: (w/ point values and npc location listed next to them)Points Item 1pt Red Frame - Gift Merchant (Prontera) Chung Jah - Gift Merchant (Prontera)
 China - Gift Merchant (Prontera)
 Yellow Plate
 Puppet - Doll Merchant (Prontera)
 Poring Doll - Doll Merchant (Prontera)
2pt  Crystal Mirror -
  Chonchon Doll - Doll Merchant (Prontera)
3pt  Spore Doll
 Rocker Doll
4pt  Frozen Rose
 Yoyo Doll
 Raccoon Doll
7pt  Osiris Doll
 Baphomet Doll
-
Finally, Dearles proposes a dancing test.
- The dance stage looks like a cross, and each part is just a 3×3 grid.
- You don’t need read the displayed steps — the game shows a
Hideanimation right on the target. - Once you step into the grid, a sound plays and the next target shows up.
- In short: chase the
Hideanimation by stepping on the first cell of the matching grid.
Tip
- If the step says “up right,” simply step on the very first cell of that grid (the one with the yellow star).
- Any movement speed enhancing items/buffs are recommended, but not necessary.
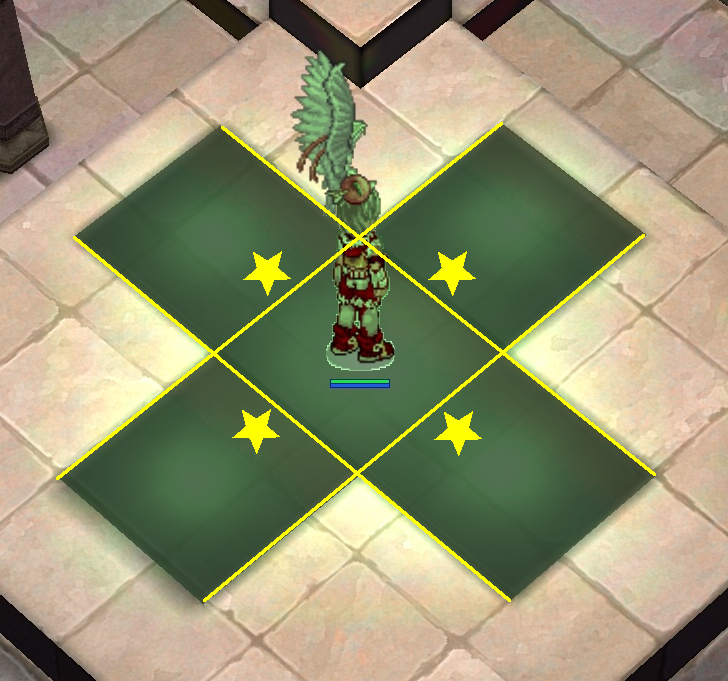
Steps:
- up left
- down right
- down left & up right
- down right
- down left & up right & up left & stay center
- down left & down right & down left
- down right & center & down right
- down left & up left & up right & down right & center
- down left & up right & up left & down right
- up right & down right & up right & down right
- up left & up right & center & up right & down left & down right
There is a current bug in the chat box message saying 'Well done.' even after the dance test fails.
-
Make sure to always talk to the examiner after each test (there are two tests in total).
-
After the dance examiner states the test was passed, talk to
for the fifth s Crumb of Sobbing Starlight and some experience.Experience for this step
Base Level Experience 1~59 7,500 60~69 18,750 70~79 47,500 80~89 30,000 90~99 42,500
-
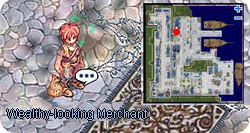
Leave to Alberta to find Bakerlan, the Wealthy looking Merchant. He is located inside a top left Alberta building in the first room upstairs .
-
He's busy and send you to his butler, Refined Steward, Mahatra .
Find Mahatra on the first floor. He requires a Stone to be sent to a Crusader in Juno.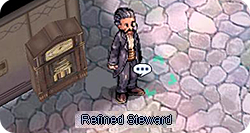
-
Go to Juno and find a crusader, Leibech .
He gives you a Receipt in turn for the Stone.
-
Then go back to in Alberta. He needs you to speak to his boss, Bakerlan.
-
Bakerlan will say you still need experience and asks you go back to Mahatra and ask for another test!
-
Mahatra gives you a quest to help the Maid, Seylin.
-
You can find Seylin in Alberta in the second floor corridor.
Seylin will ask your help to get Vigorgra as a gift for her brother.
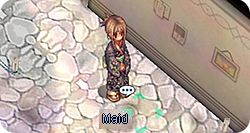
-
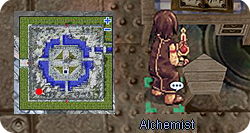
Proceed to the Alchemist Guild in Aldebaran and find an
Alchemist, Melkaba , downstairs and to the right.He'll create
Vigorgra with the following ingredients:
Requirements 10 Royal Jelly
20 Honey
30 Bear's Footskin
1 Hinalle Leaflet
1 Ment
1 Empty Bottle
10,000 ZenyNote
He does have a 3% chance to fail so you might have to look for these items again.
-
After receiving the
Vigorgra, go back to Seylin .
She'll need the Vigorgra and a letter send to her brother at Prontera Castle.
(full enter)
-
Go to Prontera Castle and find her brother, Maruin , at the entrance of the banquet hall.
(full enter)
-
After he gets the items, return to Seylin .
She rewards you with 3 Panacea.
(full enter)
-
Then go downstairs and talk to . Mahatra will send you up to Bakerlan.
-
Finally Bakerlan say you've passed the test and gives you the sixth
Crumb of Sobbing Starlight plus some experience based on your base level.
(full enter)Experience for this step
Base Level Experience 1~59 12,500 60~69 20,000 70~79 27,500 80~89 37,500 90~99 50,000
-
Return to Metz in Prontera .
He will give you the 7th and last Crumb of Sobbing Starlight.
He'll tell you more information about the Crumb of Sobbing Starlights.
(full enter)
Part 2: The Complete Sobbing Starlight
-
Continue talking (20% chance to trigger the correct dialog) to .
He tells you that if you can merge all the Crumbs of Sobbing Starlight
into the  Sobbing Starlight, he'll
reveal more secrets. But there's only one Blacksmith who has the skill
to forge it and no one knows his whereabouts. Metz tells you his family
lives in Geffen.
Sobbing Starlight, he'll
reveal more secrets. But there's only one Blacksmith who has the skill
to forge it and no one knows his whereabouts. Metz tells you his family
lives in Geffen.
(full enter)Info
You'll need to talk to him few times to activate the second quest.
-
Go to a Geffen building and find a Lonely Looking Woman, Brenda . You'll need to key in her husband's name:
She'll tell you they moved to Geffen because it's near her husband's work place.
(full enter)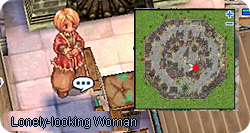
-
She asks you go talk to Cute Girl, Liana .
The cute little girl will ask you to send a Picture Letter to her father.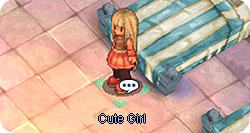
Response:
- Apprentices?
- He also misses you a lot
- ....
You will then receive the
 Doodled Message from her.
-
Head to the Coal Mines to find her father. Go to second floor of the dungeon and find by using the hidden path from .
Give the Picture Letter to him and tell him your intentions. He'll ask you to find the required ingredients to forge the Sobbing Starlight.
- 5 Mini Furnace
- 2 Oridecon Hammer
- 1 Golden or 1 Emperium Anvil
Info
The higher quality the anvil, the higher chance it'll succeed.
Emperium Anvil is the best, but your anvil will not be returned once you give it to him.
You get one chance with any anvil of your choice, but if that attempt fails, you will need to return with a Golden or Emperium Anvil instead.After you pass over the items he needs, he'll ask you send the a letter to his Wife while waiting for him to complete the forging.
(full enter)
- 5
-
Go back to his Wife in Geffen and pass the letter to.
Before you leave make sure to talk to the for a reward.
(full enter)- Receive 10
 Candy
Candy
- Receive 10
-
Go back to in the Coal Mines. If he failed to forge it, recollect the ingredients and a higher quality anvil instead. If it succeeded, you'll get the
Sobbing Starlight.
(full enter)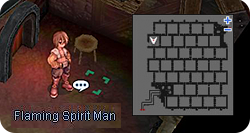
-
Go back to and tell him the good news.
He's very happy you repaired the Sobbing Starlight.
Unfortunately, he can't read the ancient words inside of it, so he sends you to the Magician, Dhota in Geffen.
(full enter)
-
Go to the Geffen Tower and find and the highest floor. Type:
he'll ask you to go to Umbala to get the solution instead.
(full enter)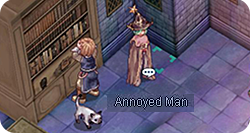
Info
The Umbala Language Quest must be completed in order to continue.
-
Go to Umbala and talk to a Native named Laotan for clue.
But he will only exchange the clue for a Mr. Smile.
(full enter)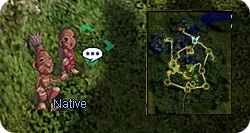
-
According to the Native, you will have to find a Fastidious-Looking Guy, Cyon .
After you tell him your intentions he'll ask you to collect 10 Worn Out Page.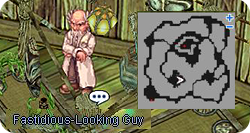
After bringing him the required items, he hands over an Ancient Document.
Return to Prontera for Metz.
Part 3: The Ancient Document
-
states Frank needs to translate the Ancient Document. Select:
- Where is he?
- I see.
-
Go to Alberta and to find a Fastidious Old Man, Frank .
But he seems to talking to himself and mumbles about his eyesight.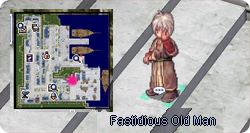
Go to Alberta's Armor Dealer and buy him a pair of 1
Glasses
-
Once he receives the
Glasses, he'll help
translate the Ancient Document. Once he finishes, keep talking to him
until he gives you the Translated Ancient Language (2% chance).
-
Now go collect these items and bring them to the Giant Telescope in the West Geffen Field .
(full enter)- 4 Resin
- 12 Stone Heart
- 365 Coral Reef
Move onto one of the chairs there to find an entrance to the Valkyrie Temple.
- 4
-
Keep going up to find Valkyrie, Sandra .
After speaking to her, she kicks you out to Geffen.
(full enter)Experience for this step
Base Level Experience 1~55 22,500 56~60 30,000 61~65 50,000 66~70 87,500 71~75 175,000 76~80 300,000 81~85 400,000 86~90 525,000 91~99 875,000
-
Talk to Metz again and he'll refer you to Niflheim.
(full enter)Info
The Witch's Piano Keys Quest must be completed to continue.
-
When arriving at Niflheim find a Pleasant-Featured Lady, Serin .
She requires help. Answer:- Sure, go ahead
- Sure, let's do it
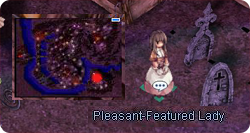
The next answer determines how you wish to continue the quest.
Option A Option B Longer quest. Shorter quest - Sure, why not? - Why should I help them. 1.250.000 exp 750.000 exp  Serin's Gold Ring
- Info
Most NPCs here are DEAD NPCs. So in order to talk to them, walk near them to let them initiate a conversation. To talk back, click on the NPC's head.
Part 4
-
Track down a kid, Alakina Anne inside a house at .
Don't click her yet. Walk near her and let her speak to you first.
Then start clicking her head.She'll cry about wanting to go back home.
After talking to her again she'll spew hints.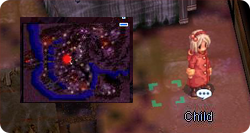
- About the curse
-
Go next to (don't click on it) the Cursed Spirit, Ashe Bruce .
He senses your strength, select: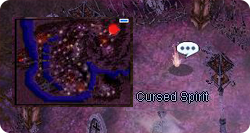
- Pick up the 3rd book.
You would be prompt to enter a spell, select the following options:
- Klaatu
- Verata
- Nictu (hidden 4th option, white textcolor)
This spell has a 10% chance of failing, so it takes a few tries of inputting this spell until his curse is finally broken.
-
When the curse is successfully broken, the
 Witch's Spell Scroll will be received.
 -
Go near and she'll ask for help to go back. Choose
- What can I do?
and then go find the Witch at the Witch Tower.
-
 The Witch is in the highest building
in Niflheim.
The Witch is in the highest building
in Niflheim.
Follow the carpet in the Piano room. Approach the piano to trigger a dialog to enter the Witch's Room.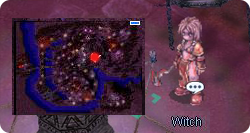
Warning
DO NOT CLICK ON Kirkena!
Instead walk next to her to trigger a dialog.
If you click on her by accident you will be teleported back to Umbala.
You can wait until the dialogue time-outs, about 60 seconds.
The Next button will change to Close and you may try again.Give her the Witch's Spell Book and choose:
- From a cursed soul...
- There's a lost child here I want to help.
She'll hand over a
 Crow Wing.
The only way to escape from her room is to use a Butterfly Wing, Warp Portal, or click her head and be sent to the Umbala Jump Point. -
Go near and she'll thank you.
Then go near the Anne again and she'll say you lied to her, and she still can't go back. -
Go back to .
Warning
DO NOT CLICK ON Kirkena!
Instead walk next to her to trigger a dialog.
Repeat 3 times till she gives you the same dialog again.She'll say the
Crow Wing only can be used by living people, which means Alakina Anne is dead. -
You did your best, so you head back and talk to . Even though you can't help Alakina Anne, she still thanks you. And as she promised, she'll give you her important item,
Serin's Gold Ring as
reward.
Talk to Serin again and she'll ask you to find Crayu the Poet.Warning
Don't equip
Serin's Gold Ring during the quest, or it'll be confiscated by certain NPCs! -
Go inside a Niflheim building and you'll find Crayu .
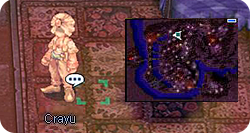
Go near Crayu (not clicking). After answering a few questions (pick any), answer:
- How do I become one of the chosen?
on the 3rd dialog, then he asks you to find Gen.
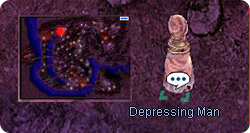
-
You find a Depressing Man, Gen just west of the building you enter. Talk to him and you find out he was the chosen one once, but failed, and he cautions you. You should find the Witch for further help.
-
Once you choose:
- Why should I help them?
find a Depressing Man, Gen , he's the npc to get cursed water, he's also West of the building you entered while doing piano quest. Talk to him and you find out he was the chosen one once, but failed, and he cautions you. He advises you to find the Witch for help.
(full enter) -
The Witch is at the highest building in Niflheim .
Follow the carpet in the Piano room and you'll enter the Witch's Room.Warning
DO NOT CLICK ON, but go stand next to the Witch, Kirkena.
If you click on her you will be teleported back to Umbala) so she begins talking.
If she is clicked on, you can wait until the dialogue time-outs, about 60 seconds.
The Next button will change to Close and you may try again.Go near the Witch, Kirkena and she'll auto talk to you first. She'll ask you to find her Witch's Spell Book.
-
Go near the Cursed Spirit (do not talk with it, just walk by), Ash Bruce . He senses your strength, select the pull and read the 3rd book. You would be prompt to enter a spell, select the following options:
- Klaatu, Verata and Nictu (hidden 4th option, white textcolor).
-
Go back to the witches castle .
Enter the witches room by clicking on the speech bubble next to the portait in the 2nd floor , return the Witch's Spell Book to Kirkena.
(full enter)
Part 5: Proving Yourself
-
Go near the and she'll tell you about the dangers of the quest. She also tell you to prove yourself is by bringing her the
 Symbol of the Nine Realms
and asks you to keep it as a secret. Go near her again and she'll ask you to come from the headstone near the stairs on the second floor the next time you visit.
(full enter) -
Go to . You need to click on her 3 times. She'll tell you thing that the Witch didn't tell you. She also wants you to inform her first-hand once you get the
Symbol of the Nine Realms from the Ruler of
the Dead and listen to the reasons why she needs these powers.- About the queen of the dead
(go full enter 3x)
-
Now go back to the Giant Telescope in West Geffen Field to teleport to Valkyrie Temple (No need to bring any ingredients). Talk to Valkyrie, Sandra and she'll say she can't help you, but she'll give you support mentally.
(full enter) -
You're on your own now. So you go back Niflheim to find more clues. You find a Mad Man, Laichin and he seems to have information you need for the quest! But he needs you to pay him twice, 40,000 Zeny and 20,000 Zeny.
(full enter) -
Listen carefully to the locations he mentions.
Info
Mad Man, Laichin gave you 1 out of 4 possibles sequences and you have to go in this specific order.
The locations are random for each person and there are 4 locations you need to go out of a total of 8.
The sequences looks like this:
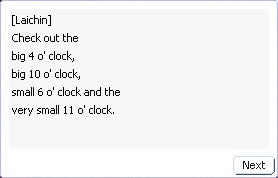
Memorize, note or screenshot your instruction.
Use this list to get the correct navigation links (or use the picture) for your sequence.Number Description Coordinates 1 big 10 o'clock 2 small 11 o'clock 3 big 1 o'clock 4 very small 11 o'clock 5 big 4 o'clock 6 small 6 o'clock 7 big 7 o'clock 8 big 5 o'clock Following sequences are possible:
- Sequence 1: (3, 8, 7, 6)
- Sequence 2: (5, 1, 6, 4)
- Sequence 3: (8, 2, 6, 4)
- Sequence 4: (5, 8, 1, 2)
Follow the sequence he mentions.
(full enter ea time you click)
The locations he mentions are in (Lowest Cave of Glast Heim [gl_dun02]).
Bring a level 4 weapon. Keep the weapon in your inventory (not equipped).
Click here for a list of level 4 weapons and their estimated rates of success.
Girls Diary 2% Rapture Rose 2% Weeder Knife 4% Combat Knife 4% Princess Knife 4% Cursed Dagger 4% Lariat 4% Kaiser Knuckle 4% Roguemaster Bow 6% Nagan 6% Firebrand 6% Forturne Sword 6% Kitchen Knife 6% Bazerald 6% Gungnir 6% Berserk 6% Dagger of Counter 6% Ice Falchon 8% Ice Pick 8% Assassin Dagger 8% Edge 10% Ceasers Sword 10% Exorcizer 10% Moonlight Dagger 10% Azoth 10% Gelerdria 10% Spike 10% Sucsamad 10% Grimtooth 12% Golden Mace 12% Long Mace 12% Book of the Apocalypse 12% Skewer 12% Chemeti 12% Cutlas 14% Byellongum 14% Immaterial Sword 14% Quadrille 14% Muramasa 16% Masamune 16% Bill Guisarme 16% Mysteltainn 16% Tirfing 16% Sword Breaker 16% Mail Breaker 16% Tjungkuletti 16% Slash 16% Cleaver 18% Rudra Bow 18% Solar Sword 18% Excalibur 18% Dragon Slayer 18% Infiltrator 20% Grand Cross 20% Schweizersabel 20% Great Axe 22% Electric Guitar 22% Katzbalger 24% Zephyrus 24% Zweihander 24% Executioner 24% Sabbath 26% Light Epsilon 26% Wizardy Staff 26% Slaughter 28% Tomahawk 28% Crescent Scythe 28% Longinus's Spear 28% Guillotine 30% Brionic 30% Ballista 32% Hellfire 32% Bloody Axe 34% Mjolnir 50%
-
Once there, click on the Mysterious Environment and it'll pop up with 3 types of message.
- The mysterious energy flows out. However, the environment seems to be creepier.
➔ Wrong sequence. Find another spot. - With the weapon you have currently, it's impossible to break the seal.
➔ Wrong weapon. - It shakes but there isn't any further response. Maybe it needs a greater impact to be activated.
➔ Keep clicking the Mysterious Environment. - Perhaps you need something more powerful. (while having a pre-10.1 update level 4 weapon in your inventory NOT equipped)
➔ Keep clicking the Mysterious Environment.
- The mysterious energy flows out. However, the environment seems to be creepier.
-
You'll get a
 Piece of Spirit once you break the seal.
And when you break the fourth seal, you'll get the
Piece of Spirit once you break the seal.
And when you break the fourth seal, you'll get the  Spiritual Whispers.
 -
 Go back to Niflheim and talk to Depressing Man, Gen .
He will identify himself as a servant to his master, Lady Hell.
His master is looking for the Spiritual Whispers and he'll send you to an Unknown Area where his master resides.
Go back to Niflheim and talk to Depressing Man, Gen .
He will identify himself as a servant to his master, Lady Hell.
His master is looking for the Spiritual Whispers and he'll send you to an Unknown Area where his master resides.
(full enter) -
Gen will send you to the Unknown Area. You'll pass a fountain, but don't click it yet. Curiosity killed the cat. Keep moving upward and you'll find the Queen of the Dead, Lady Hell.
-
Talk to Lady Hell and she'll give you
Symbol of the Nine Realms
in exchange for the Spiritual Whispers.
(full enter)Success
You can click the fountain now. If you bring Empty Bottles you'll exchange for a
 Cursed Water each time you click the fountain.
 -
Now you have two choices. Either give the
Symbol of the Nine Realms to:A. Witch, Kirkena (requires defeating more monsters, but can bring friends to help).
B. Pleasant-Featured Lady, Serin (requires defeating Incarnation of Dark Lord, aka 1 Dark Illusion, with NO help from friends).
Part 6: Kirkena or Serin
- 6a: Partyplay (defeat multiple monsters)
- 6b: Soloplay (defeat one Dark Illusion)
-
If you chose the Witch, Kirkena, go find her in her room through the headstone near the stairs on the second floor .
She'll ask for the
Symbol of the Nine Realms
and explain the reasons she needs it. Give her the symbol. If you have
Serin's Gold Ring from earlier, talk to her again, she'll take it but will return it later, but
giving you the ability to store it. If you don't have the Serin's Gold Ring, you
may talk to her, but will miss out on an experience reward later. Do
not talk to her if you still want to find Serin's Gold Ring.
Talk to her again and ask her all 3 questions in the menu. Talk to her
once again and she'll give you 1  Witch's Tonic and 5
  Witch's Medal.
Info
With 5
Witch's Medal, you can bring 4 more partners in your party to assist you in defeating
the quest monsters later on. You need to talk to the Witch to enter
Serin's room before others can follow. In order for the others to
help you fight, they will need to talk to the same gravestone that
you do in order to get into the witch's room. They will need to have
the seal on them. Do not let the extra partners lose any of the
Witch's Medal, they
will need to be returned.Kirkena found the location of Serin. Once you're ready, Kirkena will send you to a copy of nif_fild02 with many monsters on it: Ghouls, Succubus, Wraiths, Injustices, Evil Druids, and Ancient Mummies, which do not give EXP or drop anything. You must fight your way past them to get to the portal on the other side. Enter it, and you'll be in Serin's room. If you have people helping you, they will be given the option to either choose to be teleported directly to Serin or walk through the path with you.
Important
If you are doing the quest on multiple characters at once, there may be a bug/feature that only allows the character that gave the Witch's Medal to the party member to go through the portal. (Example: Character A, B & C are doing the quest. Character C gives a medal to character D (who is not doing the quest) who chooses to walk the path. Characters A & B will not be able to enter the portal if Character C enters first.)*
-
 You'll find Serin at the Unknown Area. Talk to her and chose:
- Stop her.
-
Serin will summon monsters to attack you.
Try not to stand near her when you talk to her.You'll need to defeat these monsters:
- 1 Dark Illusion
- 2 Ancient Mummy
- 2 Wraith
- 5 Ghoul
-
Once you beat the monsters, Serin will reappear. She'll tell you she's happy that she met you and she'll give up her dream and live peacefully in Niflheim. Later on she'll send you back to the Witch's room. There is a 10 minute time limit on this battle.
Info
Make sure to get all Witch Medals from friends before talking to Serin as friends can't teleport back with you to the Witch.
-
 If you chose Pleasant-Featured Lady, Serin, go find Serin and she
explains that the witch is going to summon Dark Lord which will
devastate the world, instead, to pass her the Symbol of the Nine Realms
to stop the witch. She'll send you directly to her room.
If you chose Pleasant-Featured Lady, Serin, go find Serin and she
explains that the witch is going to summon Dark Lord which will
devastate the world, instead, to pass her the Symbol of the Nine Realms
to stop the witch. She'll send you directly to her room. -
In the room listen to her reasons for using the
Symbol of the Nine Realms.
Serin has tricked you and she was the one who wanted to summon Dark Lord
and so you must "Stop her". After talking to her, Dark Lord will appear.
(full enter)Talk to Dark Lord and 1 Dark Illusion is summoned to attack you. There is a 10 minute time limit on this battle.
-
Once you beat the Dark Illusion, Serin will reappear. She'll tell you she's happy that she met you and she'll give up her dream and live peacefully in Niflheim. Later on she'll send you back to the Witch's room.
(full enter)
Part 7: The Sign
-
Talk to and she's happy you stopped Serin.
If you did 6a and are carrying the storeable Serin's Gold Ring with
you, you'll get 1,250,000 experience points as a reward. You need to
have all 5 Witch's Medal in your
inventory. If you're not carrying Serin's Gold Ring with
you, you will only receive 750,000 experience points.
Serin's Gold Ring with
you, you'll get 1,250,000 experience points as a reward. You need to
have all 5 Witch's Medal in your
inventory. If you're not carrying Serin's Gold Ring with
you, you will only receive 750,000 experience points.Info
You can re-enter Kirkena's room by using the picture near the stairs' portal.
-
You did 6a?. If you still have the storeable Serin's Gold Ring return it to Serin NOW or you will be unable to do so later. You will get 1,250,000 experience points as a reward. This reward can only be gained through Part 6a, as it's the only part which gives you the storeable
Serin's Gold Ring -
Talk to to enter to Lady Hell room.
When you meet Lady Hell, she won't have much to say to you. -
Next, go the Valkyrie Temple and talk to Sandra .
She's happy that you can complete the quest, and proved your courage to God.
She'll give you The Sign as proof that you are God's Chosen One.
You'll be able to enter Valhalla with The Sign.
(full enter) -
Go back to Prontera and pass The Sign to Metz .
He's pretty excited when you pass The Sign to him and he is glad you completed the quest. He'll start to study The Sign.- Metz takes some time to study The Sign. Come back after 2 hours.
-
After taking The Sign, Metz asks you to bring it to Engel Howard to fix it.
- Engel takes some time to fix The Sign (into an equippable accessory). Come back after 2 hours.
-
Bring The Sign back to Metz. After he finds out the truth of The Sign, his wish is fulfilled.
He will then give you 5,000,000 base EXP.Sign Iteminfo
It should be noted that the 5% ATK that The Sign gives is a boost similar to a racial or elemental card, not a straight ATK boost. (aka, the ATK portion of The Sign will not affect skills like Soul Destroyer, Cart Termination or Grand Cross).
-
Bring
 The Sign and Sobbing Starlight to Gen .
Gen will warp you to his Master's room. Meet Lady Hell and pass the Sobbing Starlight to her.
Then sit back and watch the fireworks display! After the fancy display, Lady Hell will give you  Lucifer's Lament.
Lament Iteminfo
Lucifer's Lament is storagable in your Master Storage, which means you may use it on any character.
-
Go to the Geffen Fountain and click on it to enter Geffenia. The portal will open temporarily North of the Fountain, and anyone regardless of class, level, or having done the quest may enter it. Be warned however that this map has strong monsters.
Info
- You may return the non-storeable Serin's Gold Ring to Serin now.
- Should you not be able to store the Ring and should Serin not accept the gold ring at this step. Post a Gitlab Support Ticket.
- You may return the non-storeable